-
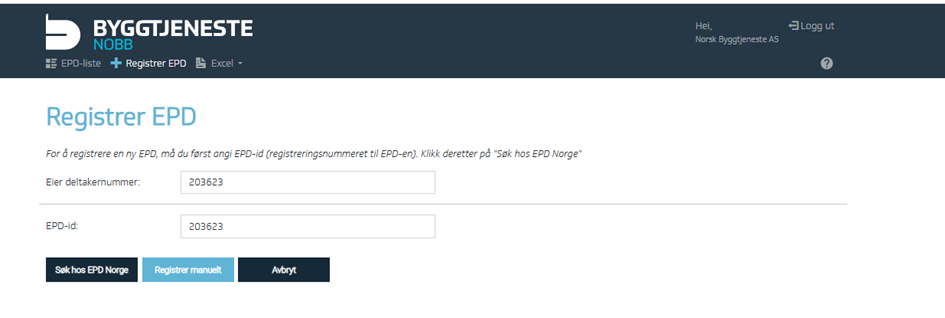
Go to the register and select + Register EPD.
-
Enter the EPD ID copied from the specific EPD (you can only import one at a time).
If the EPD is not available at EPD Norge or is not machine-readable, you will be taken to this page:
-
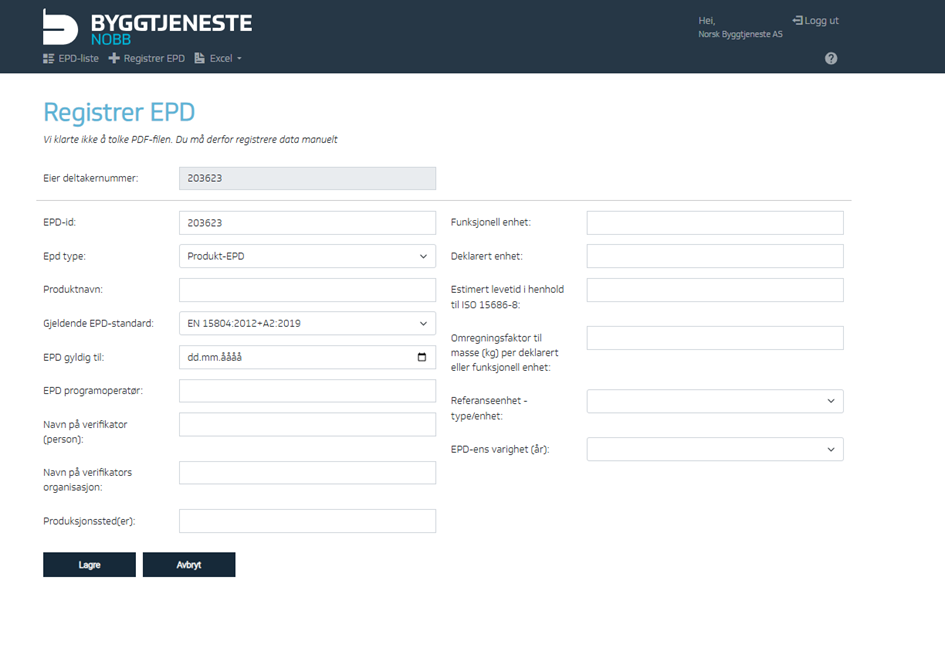
You will first enter the editing menu. Start by entering the EPD information
-
EPD ID – Enter the declaration/publication number. This ID must exactly match the ID used or to be used at the item level in connection with the EPD conversion factor.
-
Product – Enter the product to which the EPD applies.
-
EPD valid until – Enter the expiration date of the EPD.
-
EPD program operator – Found on the front page of the EPD. Copy and paste the company name here.
-
Name of verifier – The independent third-party verifier’s name, found under verification.
-
Verifier organization name – The name of the verifier’s organization, found under verification.
-
Production site(s) – Usually found on page 2 of the EPD.
-
Functional unit – Optional field; enter if specified.
-
Declared unit – Usually found on page 2 of the EPD.
-
Estimated lifetime – The product’s expected lifetime, often found on page 3, though this may vary.
-
Lifetime in EPD – Some EPDs specify different lifetimes depending on the application. For these, use an average value since only one lifetime can be registered in the EPD register.
-
Conversion factor to mass (kg) per declared or functional unit – Optional; enter if specified.
-
Reference unit – type/unit – Enter the same value as the declared unit.
-
Time period – Typically 5 years; how long the EPD is valid.
-
Finish by clicking Save.
-
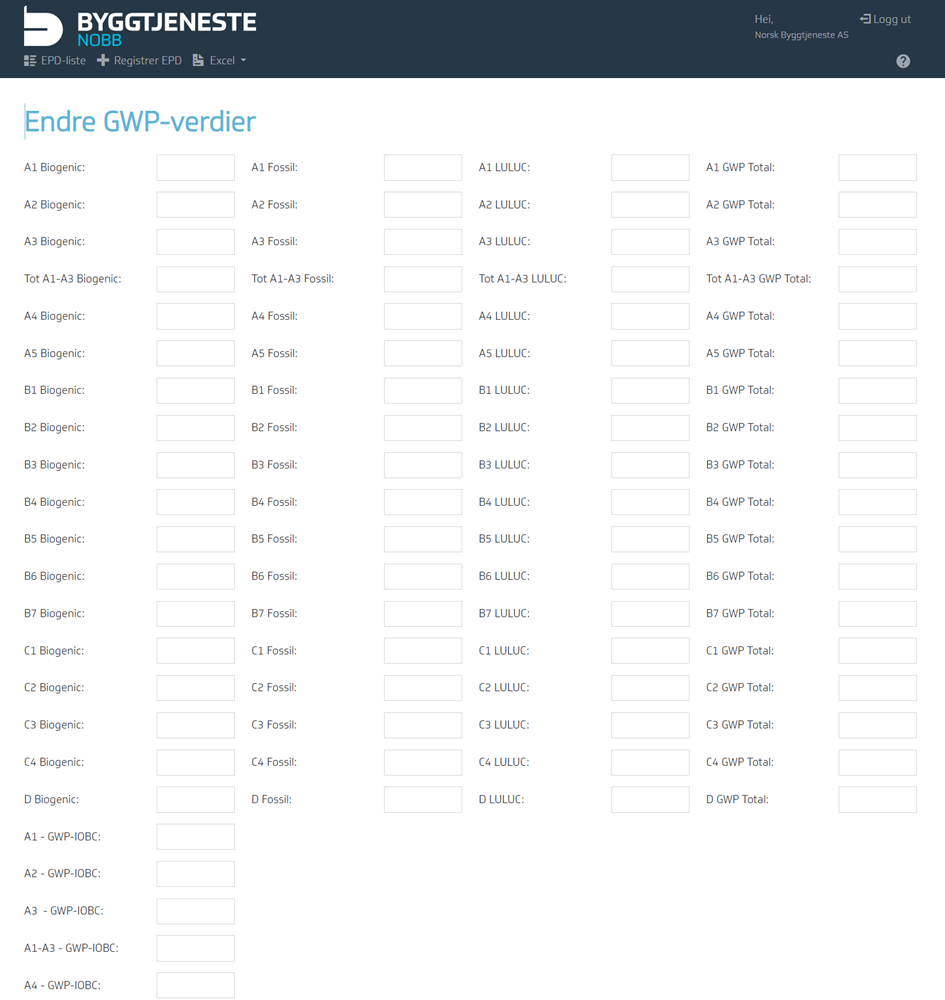
Next, you will be prompted to enter GWP values.
Remember to follow the rules for registering GWP values: Rules for Registering GWP Values
-
Finally, don’t forget to click Save again.
After registering an EPD, it’s important to link it to the item. See the instructions under Environmental Data.